
문제화면이다.
ID, PW, OTP를 입력하면 로그인이 되는 방식인 거 같다.
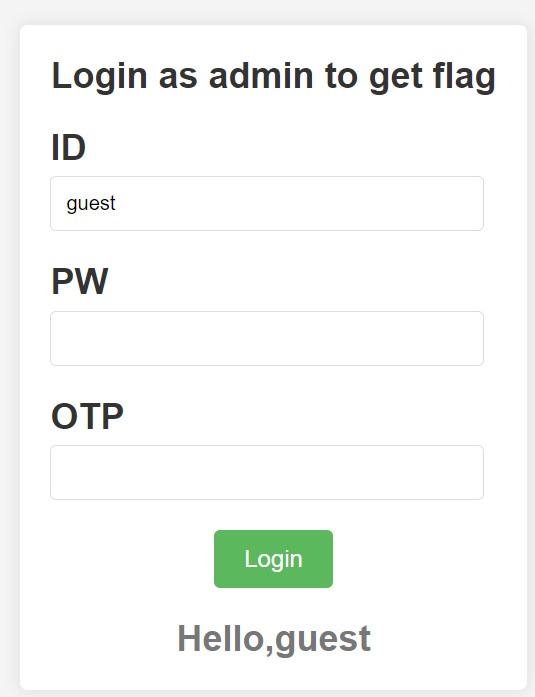
하지만 ID 만 입력했는데도 "Hello,guest" 라는 문구가 뜬다.
문제 소스코드를 다운받아 확인해보자.
<?php

function generatePassword($length) {
    $characters = '0123456789abcdef';
    $charactersLength = strlen($characters);
    $pw = '';
    for ($i = 0; $i < $length; $i++) {
        $pw .= $characters[random_int(0, $charactersLength - 1)];
    }
    return $pw;
}

function generateOTP() {
    return 'P' . str_pad(strval(random_int(0, 999999)), 6, "0", STR_PAD_LEFT);
}

$admin_pw = generatePassword(32);
$otp = generateOTP();

function login() {
    if (!isset($_POST['cred'])) {
        echo "Please login...";
        return;
    }

    if (!($cred = base64_decode($_POST['cred']))) {
        echo "Cred error";
        return;
    }

    if (!($cred = json_decode($cred, true))) {
        echo "Cred error";
        return;
    }

    if (!(isset($cred['id']) && isset($cred['pw']) && isset($cred['otp']))) {
        echo "Cred error";
        return;
    }

    if ($cred['id'] != 'admin') {
        echo "Hello," . $cred['id'];
        return;
    }

    if ($cred['otp'] != $GLOBALS['otp']) {
        echo "OTP fail";
        return;
    }

    if (!strcmp($cred['pw'], $GLOBALS['admin_pw'])) {
        require_once('flag.php');
        echo "Hello, admin! get the flag: " . $flag;
        return;
    }

    echo "Password fail";
    return;
}

?>

<!DOCTYPE html>
<html>
<head>
    <link rel="stylesheet" type="text/css" href="style.css">
    <title>Easy Login</title>
</head>
<body>
    <div class="login-container">
        <h2>Login as admin to get flag<h2>
        <form action="login.php" method="post">
            <div class="form-group">
                <label for="id">ID</label>
                <input type="text" name="id"></br>
            </div>
            <div class="form-group">
                <label for="pw">PW</label>
                <input type="text" name="pw"></br>
            </div>
            <div class="form-group">
                <label for="otp">OTP</label>
                <input type="text" name="otp"></br>
            </div>
            <button type="submit" class="button">Login</button>
        </form>
        <div class="message">
            <?php login(); ?>
        </div>
    </div>
</body>
</html>
첫 번째 page 인 index.php이다.
일단 중요한 부분만 보면은...
<?php

function generatePassword($length) {
    $characters = '0123456789abcdef';
    $charactersLength = strlen($characters);
    $pw = '';
    for ($i = 0; $i < $length; $i++) {
        $pw .= $characters[random_int(0, $charactersLength - 1)];
    }
    return $pw;
}

function generateOTP() {
    return 'P' . str_pad(strval(random_int(0, 999999)), 6, "0", STR_PAD_LEFT);
}

$admin_pw = generatePassword(32);
$otp = generateOTP();

function login() {
    if (!isset($_POST['cred'])) {
        echo "Please login...";
        return;
    }

    if (!($cred = base64_decode($_POST['cred']))) {
        echo "Cred error";
        return;
    }

    if (!($cred = json_decode($cred, true))) {
        echo "Cred error";
        return;
    }

    if (!(isset($cred['id']) && isset($cred['pw']) && isset($cred['otp']))) {
        echo "Cred error";
        return;
    }

    if ($cred['id'] != 'admin') {
        echo "Hello," . $cred['id'];
        return;
    }

    if ($cred['otp'] != $GLOBALS['otp']) {
        echo "OTP fail";
        return;
    }

    if (!strcmp($cred['pw'], $GLOBALS['admin_pw'])) {
        require_once('flag.php');
        echo "Hello, admin! get the flag: " . $flag;
        return;
    }

    echo "Password fail";
    return;
}

?>
php 전체 부분이다.
비밀번호를 생성하는 함수, OTP 생성 함수 , 로그인 함수가 담겨있기 때문이다.
function generatePassword($length) {
    $characters = '0123456789abcdef';
    $charactersLength = strlen($characters);
    $pw = '';
    for ($i = 0; $i < $length; $i++) {
        $pw .= $characters[random_int(0, $charactersLength - 1)];
    }
    return $pw;
}

function generateOTP() {
    return 'P' . str_pad(strval(random_int(0, 999999)), 6, "0", STR_PAD_LEFT);
}

$admin_pw = generatePassword(32);
$otp = generateOTP();
비밀번호, OTP 생성하는 함수를 보면 구하기 가 까다로울 거 같다.
비밀번호를 생성하는 데는 '0~f'까지의 16진법으로 32 자릿수 이기 때문에 너무 오래 걸려서 다른 방법을 이용해야 한다.
그렇다면 로그인 함수에 대한 우회를 해야 한다는 것이다.
function login() {
    if (!isset($_POST['cred'])) {
        echo "Please login...";
        return;
    }

    if (!($cred = base64_decode($_POST['cred']))) {
        echo "Cred error";
        return;
    }

    if (!($cred = json_decode($cred, true))) {
        echo "Cred error";
        return;
    }

    if (!(isset($cred['id']) && isset($cred['pw']) && isset($cred['otp']))) {
        echo "Cred error";
        return;
    }

    if ($cred['id'] != 'admin') {
        echo "Hello," . $cred['id'];
        return;
    }

    if ($cred['otp'] != $GLOBALS['otp']) {
        echo "OTP fail";
        return;
    }

    if (!strcmp($cred['pw'], $GLOBALS['admin_pw'])) {
        require_once('flag.php');
        echo "Hello, admin! get the flag: " . $flag;
        return;
    }

    echo "Password fail";
    return;
}
로그인 함수 즉 로그인하는 과정을 전부 우회해야 한다.

일단 ID에 "admin"을 입력한 결과 "OTP fail" 이 출력되는 모습을 볼 수 있다.
그렇다면 로그인 함수에서 어느 부분에서 막힌 거냐...
if ($cred['otp'] != $GLOBALS['otp']) {
        echo "OTP fail";
        return;
    }
이 부분에서 막혀 "OTP fail" 이 출력된 것이다.
버프스위트로 좀 더 자세히 들여다보자.

id를 "admin"만 넣어 보냈을 때

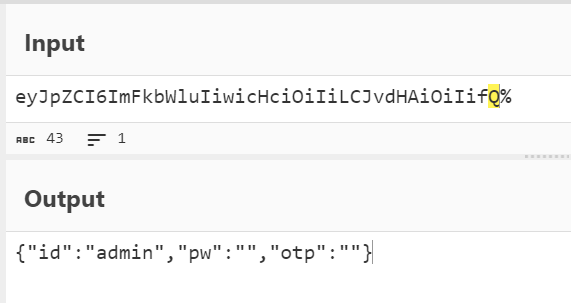
cred 가 base64 인코딩 되어 전송되고 있다.
base64를 decode 해서 확인해 보면

JSON 형식으로 인코딩 된 (POST) 데이터를 볼 수 있다.
왜냐하면

로그인을 시도할 때 login.php로 들어가게 된다 문제파일을 보면 login.php 이 있다.
확인해 보면
<form id="redir" action="index.php" method="post">
    <?php
    $a = array();
    foreach ($_POST as $k => $v) {
        $a[$k] = $v;
    }

    $j = json_encode($a);
    echo '<input type="hidden" name="cred" value="' . base64_encode($j) . '">';
    ?>
</form>

<script type="text/javascript">
    document.getElementById('redir').submit();
</script>
POST로 전송된 데이터를 배열로 복사하고 , 그 배열을 JSON 형식으로 인코딩한 후에 base64로 인코딩한다.
그래서 id, pw, otp 가 배열 형식으로 전달되는 것이다.
그럼 다 알았으니 이제 문제를 풀어 보자.
if ($cred['otp'] != $GLOBALS['otp']) {
        echo "OTP fail";
        return;
    }
먼저 아까 보여준 otp를 확인하는 과정이다.
여기서 php 비교에 대한 지식이 필요하다.
php에서는 "==" , "===" 비교가 있는데
"==" (equal) 은 느슨한 비교이고 이것은 "!=" 도 마찬가지이다.
"===" (identical) 은 엄격한 비교이다.
둘이 차이점은 느슨한 비교는 값만 비교하는 것이고 엄격한 비교는 값과 형식 모두 비교를 한다는 점이다.
그래서 연산자를 사용할 때는 데이터 형식이 다르더라도 내용이 같으면 true로 판단한다는 점이다.

그렇다면 이 배열에서 우리가 OTP에 대해서 간단한 수정만 한다면 OTP를 우회한다는 것이다.
그럼 이제 pw에 대해서 우회해보자.
 if (!strcmp($cred['pw'], $GLOBALS['admin_pw'])) {
        require_once('flag.php');
        echo "Hello, admin! get the flag: " . $flag;
        return;
    }
OTP를 정상적으로 우회했다고 했을 때 pw를 보면 php의 내장 함수인 'strcmp()'을 사용 중인 것을 확인할 수 있다.
'strcmp()'는 두 개의 문자열을 비교하여 같다면 0을 반환한다.
그래서 '! strcmp()'을 사용하여 두 비밀번호가 일치하는지를 확인하는 거 같다.
여기서 'strcmp()'에 대한 취약점은 배열에 들어가는 경우 NULL을 반환한다.
PHP에서는 NULL을 문자열과 비교할 때는 빈 문자열과 같은 방식으로 처리된다.
따라서 NULL과 빈 문자열을 비교하면 True을 반환한다.
그렇다면 pw, otp에 알맞은 값을 base64로 인코딩 시켜 Forward 한다면 플래그가 출력되는 것이다.

'CTF' 카테고리의 다른 글
| (CTF 출제)DreamHack - funjs (1) | 2024.05.03 |
|---|---|
| (CTF 출제)DreamHack - Flying Chars (0) | 2024.05.02 |
| (CTF 출제)DreamHack - Mango (0) | 2024.04.30 |
| (CTF 출제)DreamHack - Carve Party (수정) (0) | 2024.04.05 |
| (CTF 출제)DreamHack - PHPreg (수정) (0) | 2024.04.05 |